
TL;DR
Get ready for Prime Big Deal Days — try Prime free
Exclusive member deals on October 6–7, plus fast free delivery. Cancel anytime.
Start your free trialAs an affiliate, we earn on qualifying purchases.
You can safely incorporate LED and microcurrent devices into your weekly skincare by following a clear sequence—LED first, then microcurrent with a conductive gel. Consistency over months yields the best, most noticeable results. Split sessions or alternating days may suit sensitive skin or beginners.
Imagine transforming your bathroom into a mini clinic, where technology works quietly, day after day, supporting your skin’s natural vitality. LED and microcurrent devices, once exclusive to dermatology offices, now fit comfortably into your weekly routine, offering a non-invasive way to boost skin health. But how do you make these powerful tools work together without confusion or risk? That’s what this guide clarifies.
If you’ve ever wondered how to fit these devices into your busy schedule or what order to use them for maximum benefit, you’re not alone. With clear steps and expert insights, you’ll learn how to incorporate LED and microcurrent treatments seamlessly—supporting your skin’s natural glow, firmness, and overall health, without overdoing it or risking irritation.
Always start with clean, dry skin before using LED devices—products can block or reflect light if left on.
Apply a water-based conductive gel or serum before microcurrent treatments to ensure proper conductivity and comfort.
Sequence treatments: LED first, then microcurrent—this maximizes each device’s effectiveness.
Consistency over several weeks is essential; expect subtle improvements in skin texture and firmness.
Prioritize safety: patch-test, avoid contraindications, and follow device instructions carefully.
How to Work LED & Microcurrent Into Your Weekly Skincare Routine
Once exclusive to dermatology offices, these two clinic-born technologies now fit on your bathroom shelf. The rules are simple: cleanse first, LED on dry skin, microcurrent with a conductive gel — and consistency over months beats intensity every time. This is the exact order, schedule, and safety map.
LED → MC
The Golden Sequence
Light first on clean dry skin, current second over water-based conductive gel. Never the reverse.
4–8 wks
Time to Visible Results
Subtle texture and firmness gains compound with steady sessions — sporadic use delivers little.
2 Origins
NASA + Physical Therapy
LED grew out of 1990s NASA wound-healing research; microcurrent came from rehab medicine.
10–20
Min per LED session
5–15
Min per microcurrent
3–5×
LED sessions / week
~500%
ATP claim (1982 study)*
FDA
Cleared, not approved
Same Bathroom Shelf, Completely Different Biology
Both are non-invasive, but they act on different targets. LED is light absorbed by mitochondria (photobiomodulation); microcurrent is low-level electricity that mimics your body’s own bioelectric signals. That difference dictates the order you use them in.
LED Light Therapy
Specific wavelengths penetrate to different depths and signal cells to produce energy (ATP) and repair. Works on clean, dry, product-free skin — creams and mineral SPF can block or reflect light.
- Red (~630–660 nm): collagen stimulation, fine lines — the anti-aging workhorse.
- Near-infrared (~810–850 nm): deeper reach; circulation and tissue repair.
- Blue (~405–420 nm): targets acne-causing C. acnes bacteria.
- Amber (~590 nm): redness and soothing — weaker evidence base.
Wavelength Depth Map (nm)
Microcurrent
Gentle microamp pulses mirror the body’s natural current — often called a “workout for facial muscles.” Requires a water-based conductive gel; on dry skin it won’t conduct and can sting.
- Muscle activation: lifting effect on brows, jawline, and cheek contours.
- Collagen & elastin: stimulation supports firmness over time.
- Lymphatic drainage: reduces puffiness and fluid retention.
- Cumulative but temporary: the lift fades if you stop — like skipping the gym.
Evidence Check
One Session, Five Steps, Zero Guesswork
Sequencing is everything. Products reflect LED light, and microcurrent can’t conduct on dry skin — so the order below protects both your results and your barrier.
Cleanse
Remove all dirt, oil, and makeup. Both technologies demand a clean canvas.
2 minLED First
On clean, fully dry skin. Light primes cellular activity and collagen signaling.
10–20 minApply Gel
Thin layer of water-based conductive gel or serum for even current flow.
30 secMicrocurrent
Glide slowly over jawline, cheeks, and brows. The gel prevents stinging.
5–15 minSeal It In
Serums, moisturizer — plus SPF by day, nourishing recovery care by night.
2 minSplit the session instead. Many dermatologists suggest LED on some days and microcurrent on others — especially for beginners or reactive skin. Recovery days keep the barrier calm while efficacy stays intact.
A Balanced 7-Day Schedule That Fits a Busy Life
Consistency beats intensity. This template alternates active treatment days with recovery, so you never overtax the skin barrier. Scale back any week you notice lingering redness.
| Day | Treatment | Duration | Why It Works |
|---|---|---|---|
| Monday | LED + Microcurrent | 20–25 min | Evening session on clean skin for maximum absorption and rejuvenation. |
| Tuesday | Microcurrent only | 10–15 min | Target lifting zones — jawline, cheeks — without light over-stimulation. |
| Wednesday | LED + Microcurrent | 20–25 min | Repeat Monday’s combo to reinforce collagen boost and muscle toning. |
| Thursday | Rest / serum only | — | Recovery day. Let the barrier reset, especially if any redness appears. |
| Friday | LED + Microcurrent | 20–25 min | Prime skin for the weekend — or simply hold the routine steady. |
| Saturday | Optional mask | 15 min | Calming or nourishing mask supports recovery and relaxation. |
| Sunday | Rest / gentle serum | — | Close the week with a restorative reset before the next cycle. |
Tune it to your skin: reduce frequency if you see persistent redness or discomfort. Microcurrent’s lift is cumulative but temporary — maintenance sessions of 2–3× weekly keep it; stopping lets it fade.
When Results Show Up — Weeks of Consistent Use
The Fine Print That Protects Your Face
Both technologies are broadly safe when used as directed — but “generally safe” is not “safe for everyone.” Run this checklist before your first session and any time your health status changes.
Smart Habits
- Patch-test each new device on a small area first.
- Start slow — shorter sessions, fewer days, build up.
- Follow device instructions for timing and intensity.
- Stop if irritation persists beyond mild, brief flush.
Hard Contraindications
- Pacemaker or implanted electrical device — never use.
- Pregnancy, epilepsy, active cancer — avoid (precautionary).
- Open wounds or active skin infections — wait until healed.
- Never run current over the thyroid gland or eyeballs.
Proceed With Care
- Photosensitizing medications (isotretinoin, certain antibiotics, high-dose retinoids) — check with your doctor first.
- History of photosensitivity — medical clearance before use.
- Eye protection matters for bright panels and masks, especially blue light.
- Retinoid nights — consider alternating rather than stacking.
How Clinic Tech Landed on Your Shelf
Both devices carry medical DNA — which is why the at-home versions deserve the same respect for protocol and safety as their clinical ancestors.
Wound-Healing Research
LED light studied for tissue repair in space missions.
Derm Offices & PT Clinics
Microcurrent used in physical therapy and Bell’s palsy rehab.
At-Home Devices Arrive
NuFACE, ZIIP, LightStim, Omnilux, CurrentBody — cleared, not “approved.”
The 5-Step Ritual
Cleanse → LED → gel → microcurrent → seal. Repeat, recover, glow.
Consistency over months yields the most noticeable results. Expect subtle, compounding improvements in texture and firmness — and if you’re sensitive or new, split sessions across alternating days. Your skin barrier will thank you.
What Exactly Do LED and Microcurrent Do for Your Skin?
LED and microcurrent are both non-invasive tech tools that support your skin, but each works very differently. LED uses specific light wavelengths to stimulate cellular activity. Red light boosts collagen, which is essential for skin elasticity and reducing fine lines; near-infrared penetrates deeper, promoting circulation and aiding in tissue repair; blue light targets bacteria, helping to clear acne and reduce inflammation.
Microcurrent delivers gentle electrical pulses that mimic your body’s natural bioelectric currents. This stimulation enhances cellular metabolism, promotes collagen and elastin production, and activates muscle fibers for a lifting effect. It also improves lymphatic drainage, reducing puffiness and toxins.
Understanding these mechanisms matters because it influences how you schedule treatments. For example, using LED to stimulate collagen early in your routine can prepare your skin for the toning effects of microcurrent, which can then further lift and contour. Recognizing these roles helps you craft a routine that amplifies benefits without overloading your skin or causing irritation.
Choosing the right device at the right time is akin to a layered approach to skincare—each step builds on the previous, leading to better overall results. Ignoring their distinct functions might mean missing out on potential synergistic effects or risking overstimulation, which can cause redness or sensitivity.
As an affiliate, we earn on qualifying purchases.
How to Time Your Treatments for Best Results
Incorporating LED and microcurrent effectively depends on sequencing because each modality interacts differently with your skin’s physiology. Starting with a clean, dry face is crucial—products or makeup can reflect or block light, reducing LED effectiveness. Applying LED first ensures your skin absorbs the light directly, maximizing collagen stimulation and bacteria targeting. Follow with a water-based conductive gel or serum before microcurrent—this not only improves electrical conductivity but also prevents skin irritation and discomfort.
This sequence matters because microcurrent relies on proper conductivity; without a conductive medium, the electrical pulses won’t reach the deeper layers effectively, diminishing results and risking skin irritation. Using LED first also prevents potential interference from products that might reflect light or cause uneven treatment.
Here’s a detailed step-by-step:
- Thoroughly cleanse your face to remove dirt, oil, and makeup, creating a receptive environment for treatments.
- Use your LED device on clean, dry skin for 10–20 minutes, depending on your device’s guidelines. This primes your skin by stimulating cellular activity and preparing it for subsequent treatments.
- Apply a thin layer of conductive gel or serum—preferably water-based—to your face. This ensures electrical pulses are evenly transmitted and reduces discomfort.
- Use your microcurrent device for 5–15 minutes, moving gently across targeted areas. The gel helps the device glide smoothly and enhances the electrical connection.
- Finish with serums, moisturizer, and, if daytime, sunscreen; at night, consider nourishing treatments to support recovery.
Many users find that splitting treatments—using LED on some days and microcurrent on others—reduces the risk of over-stimulation, especially for sensitive skin. This approach allows your skin to recover between sessions, maintaining efficacy and minimizing irritation.
Understanding the timing and sequence is vital because it directly impacts how much benefit your skin receives. Properly sequencing treatments maximizes results while safeguarding your skin’s barrier and comfort.
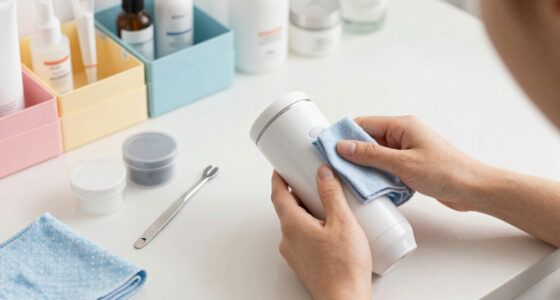
microcurrent facial device with conductive gel
As an affiliate, we earn on qualifying purchases.
As an affiliate, we earn on qualifying purchases.
Weekly Schedule: Making It Fit Into a Busy Life
Consistency is key. Here’s an example of a balanced weekly plan designed to optimize results without overtaxing your skin:
| Day | Treatment | Duration | Notes |
|---|---|---|---|
| Monday | LED + Microcurrent | 20–25 mins | Perform in the evening on clean skin for maximum absorption and skin rejuvenation. |
| Tuesday | Microcurrent only | 10–15 mins | Focus on areas needing lifting, such as jawline and cheeks, to avoid overstimulation. |
| Wednesday | LED + Microcurrent | 20–25 mins | Repeat Monday’s routine to reinforce collagen boost and muscle toning. |
| Thursday | Rest or light serum-only day | – | Give your skin a break to recover from stimulation, especially if you notice redness or sensitivity. |
| Friday | LED + Microcurrent | 20–25 mins | Prepare your skin for weekend events or maintain a regular routine for ongoing benefits. |
| Saturday | Optional mask or extra treatment | 15 mins | Use a calming mask or nourishing treatment to support skin recovery and relaxation. |
| Sunday | Rest or gentle serum | – | Wrap up the week with a gentle, restorative routine to reset your skin for the week ahead. |
This schedule balances active treatments with recovery periods, which is crucial because overdoing either can lead to irritation or diminished results. Tailoring the frequency based on your skin’s response—like reducing sessions if you experience redness or discomfort—ensures sustainable progress. Recognizing the importance of consistency and understanding your skin’s limits allows you to maximize benefits while minimizing risks.
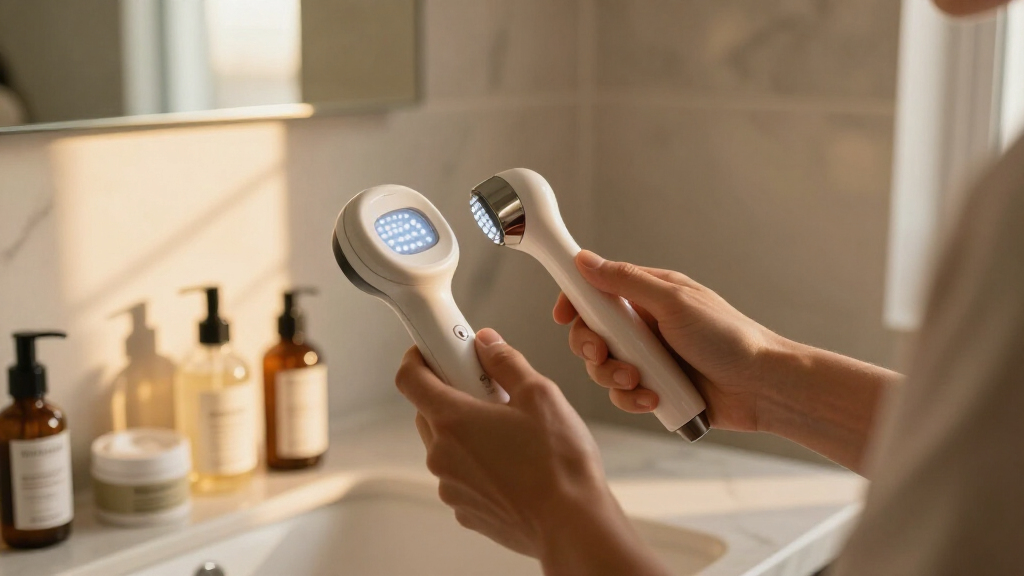
skincare LED microcurrent combo device
As an affiliate, we earn on qualifying purchases.
As an affiliate, we earn on qualifying purchases.
Safety First: Avoiding Common Pitfalls
Both LED and microcurrent are generally safe when used correctly, but understanding potential pitfalls can prevent adverse reactions. Microcurrent should never be used if you have a pacemaker, pregnancy, or active skin infections, as the electrical stimulation could interfere with medical devices or exacerbate conditions. Additionally, avoid placing electrodes over sensitive areas like the thyroid gland or directly over the eyes, as improper placement can cause discomfort or unintended stimulation of sensitive tissues.
LED therapy, while broadly safe, requires caution if you’re on photosensitizing medications such as isotretinoin, certain antibiotics, or if you have a history of photosensitivity. Using protective eyewear is essential—bright LEDs can pose risks to your vision if proper precautions aren’t taken. Always follow manufacturer instructions regarding treatment duration and frequency, as overexposure can lead to skin irritation or hyperpigmentation.
Start slowly—initial sessions should be brief and infrequent, allowing your skin to adapt. Observe for signs of redness, tingling, or discomfort, and reduce intensity or frequency if needed. Proper cleaning of devices with alcohol wipes after each use prevents bacterial buildup, which can cause infections. Never submerge electronic devices in water or use harsh chemicals, as this can damage the equipment and pose safety hazards.
Remember, these tools are supportive adjuncts—not replacements for comprehensive skincare or medical advice. Overuse or misuse can lead to irritation, sensitization, or other issues. Listening to your skin and consulting professionals when in doubt ensures a safe and effective experience.
best microcurrent facial device for sensitive skin
As an affiliate, we earn on qualifying purchases.
As an affiliate, we earn on qualifying purchases.
Expected Timeline: When Will You Actually See a Difference?
Patience is essential because the skin’s response to these treatments varies widely based on individual factors such as age, skin type, and existing conditions. Most users notice subtle improvements—such as increased skin brightness, smoother texture, or a slight lift—in about 4–8 weeks of consistent use. Microcurrent provides an immediate, temporary lift during or right after sessions, but these effects diminish within hours unless reinforced with regular treatments. The real, lasting benefits—collagen synthesis, improved elasticity, and contouring—develop gradually over months, emphasizing the importance of persistence.
LED therapy’s results are more subtle initially; small increases in collagen and cellular activity are measurable after 6–12 weeks, but visible changes in the appearance of fine lines, skin tone, and overall radiance often take longer—sometimes up to 3-6 months with consistent use. The cumulative effect of LED’s gentle stimulation encourages skin renewal and resilience, making patience and adherence crucial.
Individual results depend on multiple factors—such as baseline skin condition, age, and how diligently you follow your routine. Combining these devices with other healthy skincare habits, like daily SPF, hydration, and a balanced diet, amplifies their effects. Recognizing that these are long-term investments helps set realistic expectations, avoiding frustration and encouraging ongoing commitment.
Ultimately, understanding that improvements are gradual and that consistency yields the best results empowers you to stay motivated and attentive to your skin’s evolving needs.
Frequently Asked Questions
Can I use LED and microcurrent treatments on the same day?
Yes, most experts agree it’s safe to do both in one session. Use LED first on clean, dry skin, then follow with microcurrent—making sure to use a conductive gel for comfort and effectiveness. If your skin is sensitive, alternating days might be better to avoid over-stimulation.
How long before I see noticeable results?
Expect to notice some immediate, temporary lifting with microcurrent during sessions. More lasting improvements—like smoother skin or reduced fine lines—typically appear after 4–8 weeks of consistent use, with LED benefits gradually building over 3 months.
Are at-home devices as effective as professional treatments?
While professional devices are more powerful, at-home tools deliver meaningful results through regular, sustained use. They’re designed to support your skin’s health between professional visits, making consistency your best ally.
Can I combine these with my retinoids or vitamin C serums?
Yes, but always apply active serums after your treatment session. Avoid using potent actives immediately before or after LED/microcurrent treatments if your skin is sensitive—wait at least a few hours to prevent irritation.
Is it safe to use during pregnancy or while on medication?
Generally, LED is considered safe, but consult your healthcare provider if you’re pregnant or on photosensitizing medications. Microcurrent is usually avoided during pregnancy—check with your doctor before starting.
Conclusion
Incorporating LED and microcurrent into your routine isn’t about quick fixes. It’s about consistent, mindful support for your skin’s natural processes—like giving your face a gentle workout and a nourishing light therapy session. When you treat these tools with care and patience, the support they offer can become a quiet, powerful part of your skincare story.
Now, imagine your bathroom as a serene space where technology and routine meet—your skin thanking you with every glow and lift. The key is to stay steady, listen to your skin, and enjoy the journey toward healthier, more radiant skin.
Fall yard work Picks
leaf blowers
As an affiliate, we earn on qualifying purchases.